Aluminum A/C Vent Trims for GT86 BRZ

There are a couple of things that I want better in my Toyota 86 and the interior is definitely one of them. If you have read my previous post, enhancing the appeal of the interior had always been one of my goals.
Today, the high end sports coupes are cladded with expensive leather and chrome for a more glorified look. Take the Mercedes SLS AMG as an example, the dash is simple but with the chrome trims articulating obvious magnitudes of character and cost. Usually unspoken by most, metal and chrome are silent aesthetics that need no introduction, yet they make cabins undoubtedly inviting. Take a look at the stock plastic vs aluminum trims I had installed and the effect is obvious.
If you surf the web and eBay, you will find a few merchants selling similar aluminum trims. The bad news? They don't come cheap. Ridiculously priced, most of these "dress ups" cost hundreds excluding international shipping. Absolutely crazy!
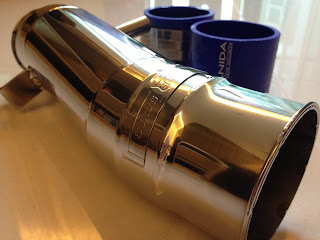
The good news. I got these machined aluminum A/C trims via Taopao.com and they cost about S$75 a pair. The trims are made by a Chinese company called "MCE" and are a matching design with the aluminum A/C knob covers I bought previously. Beautifully machined and finished, they are best looking trims available in my opinion. In fact, they look way more expensive than those that cost hundreds.

The myth... As advertised by most of these 3rd party accessory makers, installing these trims are as 'easy' as 1,2,3... because they are held to the vents by 3M adhesive tapes. I'm not kidding but that's about the dumbest thing ever because I can bet my last dollar that it will never hold up to the heat, vibrations, gravity and especially the hands of your curious passengers!
Chinese manufacturing and deception... While this cabin upgrade came at a relatively reasonable cost, there are some "over and above" handy skills involved to achieve an awesome outcome. Nevertheless, with a little time and effort, there will not be much problem. But really, just to share, these sellers are full of crap selling stories that some tapes will do you good. Sales talk are sales talks and at some point, you can only trust your instincts. Something worth noting as a buyer.

So I had both the A/C vents removed from the dash by pulling them out. The stock trims are held in place by some clips so you can get them out easily with some force but try to be gentle and not break anything. Removing those useless tapes completely from the new trims is a must and I had the surface cleaned with cleaning spirit.
As a responsible blogger, I am not going to sugar coat the situation but the first thing you need to do is to get yourself some Araldite epoxy (or equivalent) from your local hardware store or home depot. Epoxy can get messy so make sure you have necessary items such as cleaning spirits and cloth to remove excess epoxy before it cures.
In the interest of time, I used the Araldite rapid so I had only 5 minutes to mix and apply the epoxy and hardener to the vents before it sets. For those of you who would like more application time, ensure you purchase the epoxy with longer curing times. While I am not going to dive into how to mix epoxy because this is no hardware blog, do follow the recommended directions of application because the whole project could turn into a disaster if done incorrectly.

Because you wouldn't want your trims to fall off each time your girlfriend touches those vents (it can be really embarrassing), epoxy is about the best adhesive bond for the job because it binds different materials together, particularly metal and rigid plastics. Thankfully, most epoxy cures semi clear but ensuring just the right amount is used will certainly minimize the need for excess epoxy clean ups after application.
Once bonded, patience is paramount so don't get all excited to re-install the vents immediately. My advise is to leave the vent trims untouched for the epoxy to cure completely. Wait for at least 6 to 8 hours prior to re-installation.

Take it from me, similar attention to detail has gone into improving every other area of the car. Unsurprisingly, the end result of this DIY vent trim install is beautiful!
Forget the fact that the cabin of the Toyota 86 was once plastic and dull because the aluminum trims did so much to the cabin. From the A/C knobs to the vent trims, the interior is certainly more premium than before.